When configuring a Windows server with the NPS Role in order to authenticate wireless clients using PEAP (Protected EAP), you may need to generate a temporary self signed certificate in order to complete testing, or finish the configuration. Configuring the NPS server for PEAP authentication is outside of the scope of this post, and may be covered in a future post, but this will at least allow you to generate a Certificate in order to get the services running and testing completed.
From a Powershell console (running as an administrator on the NPS Server) you’ll need to run the following command.
$cert = New-SelfSignedCertificate -certstorelocation cert:\localmachine\my -dnsname servername.domain.local Be sure to configure the server name and domain name as the DNS name, otherwise authentication of users will fail if you only specify the domain name. For example:
$cert = New-SelfSignedCertificate -certstorelocation cert:\localmachine\my -dnsname nps_server.boldlygoingnowhere.local This will install the self signed certificate in the Personal Store of the local Computer.
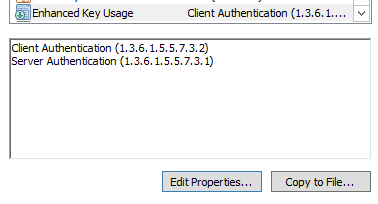
Using MMC we can then open the Certificate store for the local computer (not the current user, or the service account), and confirm that the certificate is located in the correct place. Check and confirm that the certificate is valid for Client Authentication and Server Authentication.

You should then be able to return to the NPS configuration and confirm that the EAP properties are configured to use the new certificate. You will need to restart the NPS service and you should then be able to test authentication, assuming the rest of your configuration is correct.
This should not be used for a ongoing production use, and that the Self signed certificate is only valid for 12 months.